
Create Fee Structure Setup #
After setting up your Classes and Sections, the next step is to configure the school’s Fee Categories and Fee Heads.
This section allows you to define student categories and create fee heads with installment schedules and due dates.
1. Open Fee Heads & Categories #
To begin setting up fees:
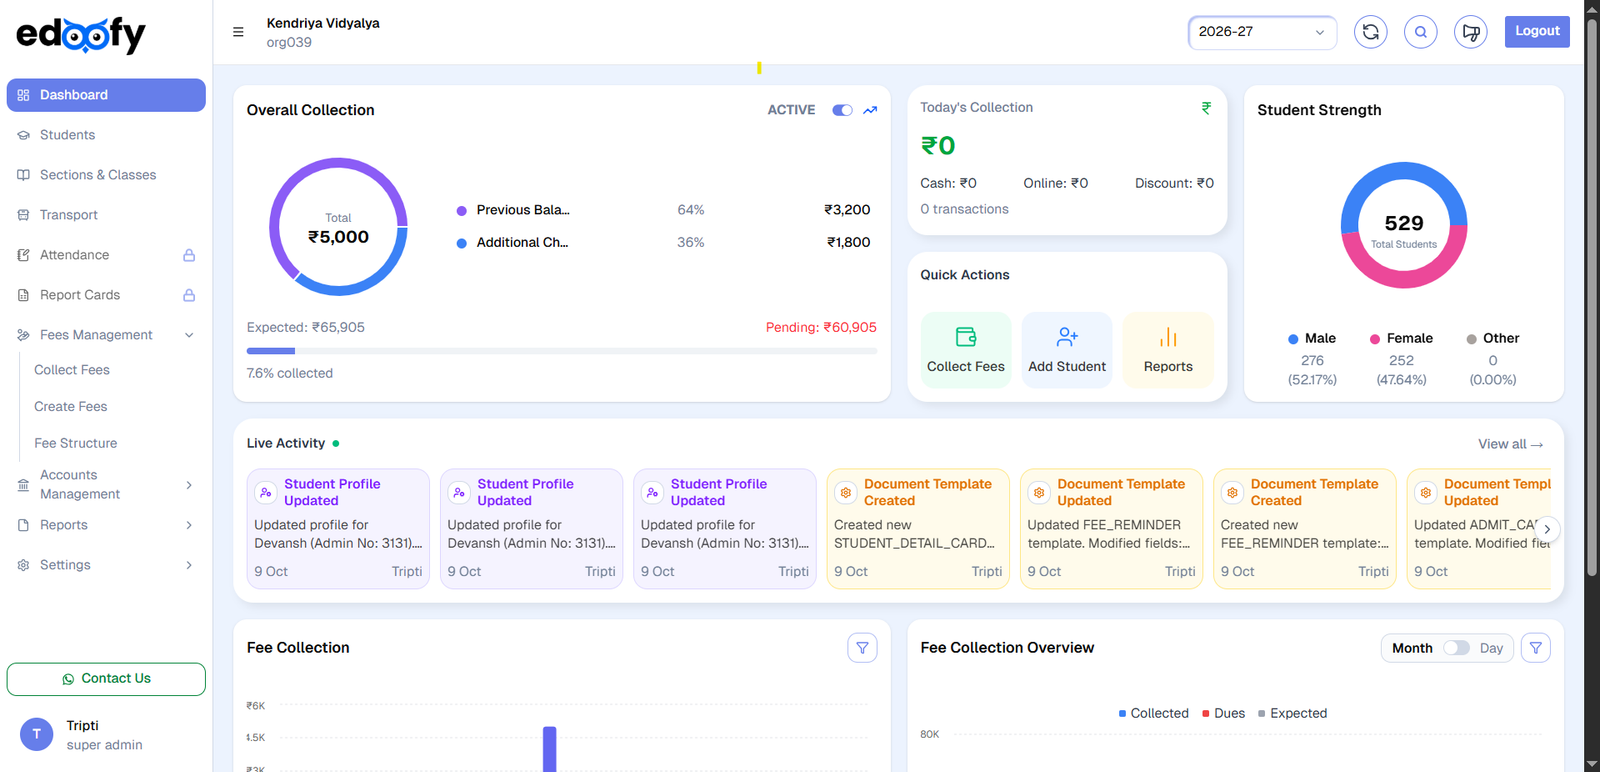
- From the Edoofy dashboard, navigate to Fees Management.
- Select Create Fees.
- You will be redirected to the Create Fees page.
On this page, you will find two main buttons:
- Create Categories
- Create Fee Heads
2. Create a Fee Category #
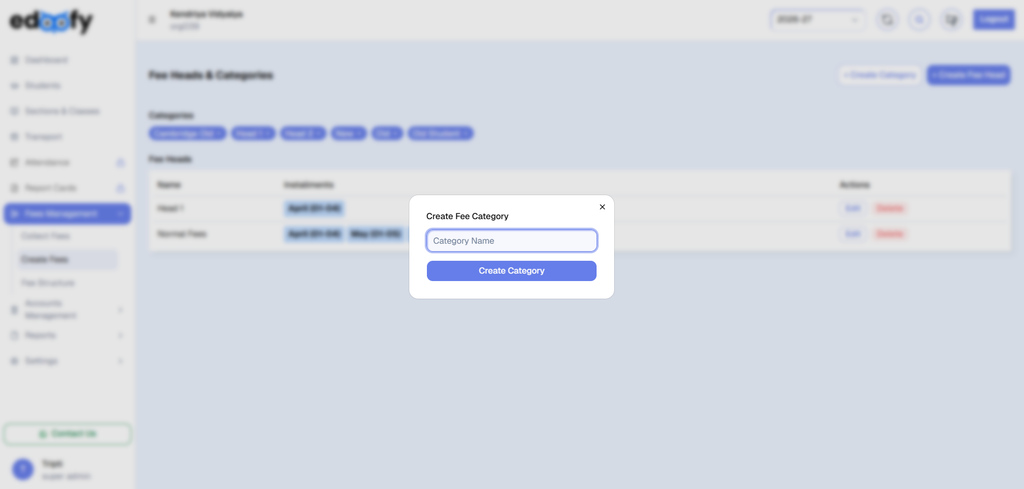
- Click on + Create Category.
- A Create Fee Category modal will appear.
- Enter the required Category Name.
- Click on Create Category.
The new category will appear in the Categories section.
Example
To create a category for General-category students:
Category Name: NEW, OLD
Click Create Category.
The NEW or OLD category will now appear in the Categories section.
3. Create a Fee Head #
Once you have created the required categories, you can create fee heads for your school.
A Fee Head represents a specific type of fee charged by the institute.
For example:
- Tuition Fees
- Transport Fees
- Examination Fees
- Admission Fees
Steps to Create a Fee Head #
- Click on + Create Fee Head.
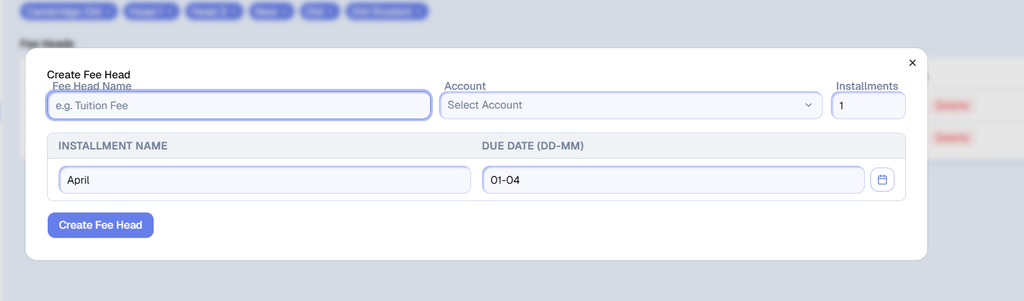
- A Create Fee Head window will appear.
You will find the following fields:
- Fee Head Name
- Account
- Installments
4. Enter Fee Head Details #
Fee Head Name
Enter the name of the fee you want to create.
For example:
Tuition Fees
Account
Select the appropriate Account from the available options(optional).
Installments
Enter the number of installments in which the fee will be collected.
For example:
12
This will generate the corresponding installment entries.
5. Configure Installments #
After you specify the number of installments, the system will display an installment table.
The table contains:
- Installment Name
- Due Date (DD-MM)
For example, for a 12-installment fee structure, you can configure the installments as follows:
| Installment | Due Date |
|---|---|
| April | 01-04 |
| May | 01-05 |
| June | 01-06 |
| July | 01-07 |
| August | 01-08 |
| September | 01-09 |
| October | 01-10 |
| November | 01-11 |
| December | 01-12 |
| January | 01-01 |
| February | 01-02 |
| March | 01-03 |
Enter the appropriate installment name and due date according to your school’s fee collection schedule.
Due Date #
The due date can be entered directly in the field or selected using the calendar icon next to the due-date field.
Note: Enter the due date in DD-MM format, as shown in the system.
6. Create the Fee Head #
After completing the fee head details and installment schedule:
- Review the information you entered.
- Make sure the fee head name, account, installment names, and due dates are correct.
- Click Create Fee Head.
The fee head will be created successfully and will appear in the Fee Heads section.
7. View Created Fee Heads #
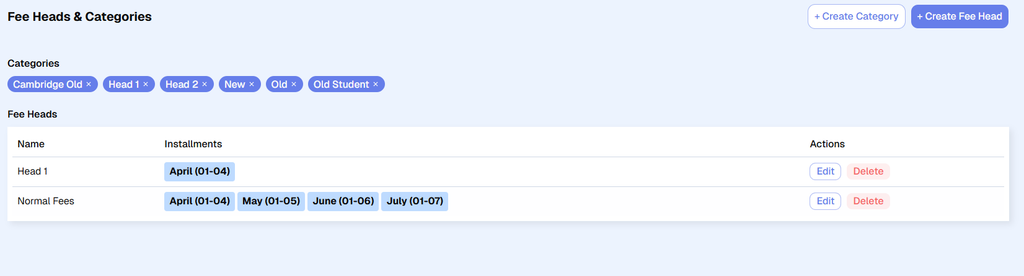
After you create a fee head, it will appear in the Fee Heads table.
The table displays:
- Name
- Installments
- Actions
For example:
Tuition Fees
The associated installments will be displayed as individual badges, such as:
April (01-04) | May (01-05) | June (01-06) | July (01-07) | August (01-08) | September (01-09) | October (01-10) | November (01-11) | December (01-12) | January (01-01) | February (01-02) | March (01-03)
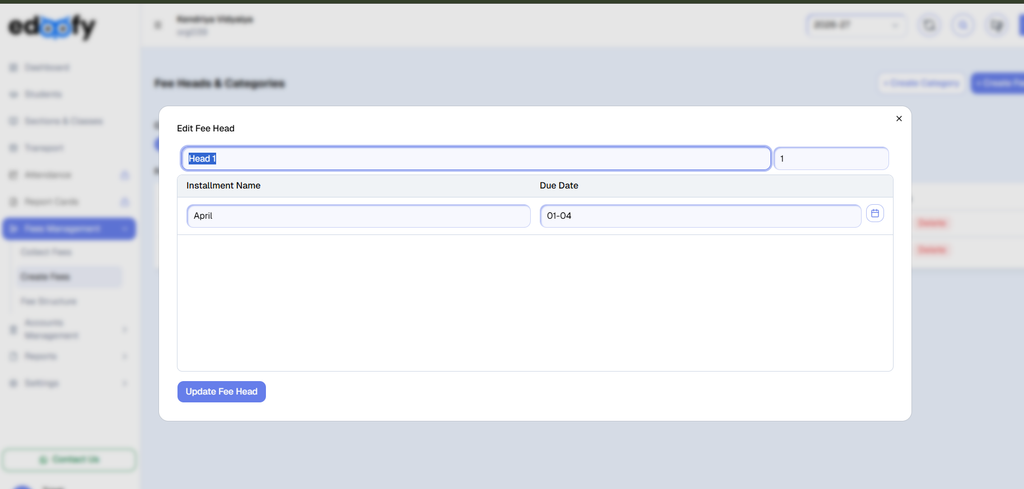
8. Edit or Delete a Fee Head #
The Actions column provides options for managing an existing fee head.
Edit
Click Edit to modify the fee head details.
Review and update the required information, then save your changes.
Delete
Click Delete to remove an existing fee head.
Important: Review the fee head carefully before deleting it, as it may be used in your school’s fee configuration.
9. Completed Fee Setup
Once you have created the required Fee Categories and Fee Heads, your basic fee configuration is complete.
For example, your setup may contain:
Categories
- New
- OLD
Fee Head
- Tuition Fees
Installments
- April to March
- Corresponding monthly due dates


