
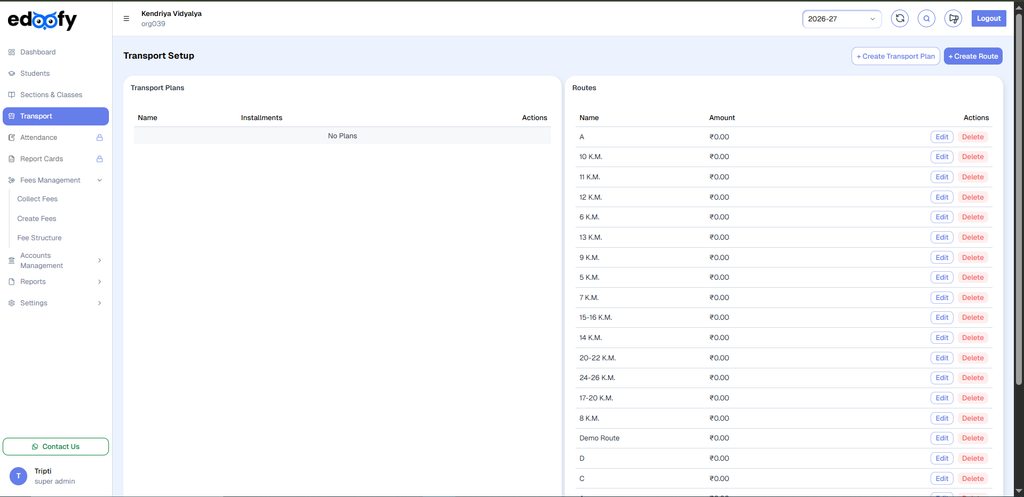
Transport Route Setup #
After Setting up the Fee Head and category we can move onto the Next Step that is creating the
Transport Route.
Create a Transport Route #
Transport Routes define the route used by students along with the applicable transportation fee.
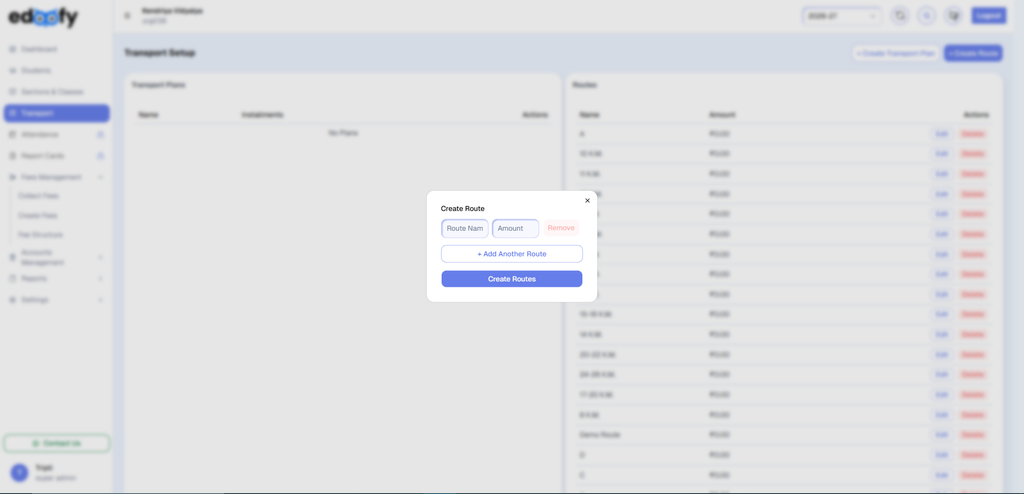
1. On the Transport Setup page, locate the Routes section on the right side.
2. Click + Create Route.
3. A pop-up modal will appear.
4. If required, click + Add Another Route to add a new route entry.
Enter the Route Name.
Example: Bus Route – 11
Enter the applicable Amount for the route.
Example: ₹2,000
Click Create Routes.
The route will be created and displayed in the Routes section.
Edit a Transport Route #
You can modify an existing route whenever required.
- Locate the route you want to update.
- Click the Edit button next to the route.
- Update the required details, such as the Route Name or Amount.
- Click Save Changes.
The updated route information will be saved successfully.
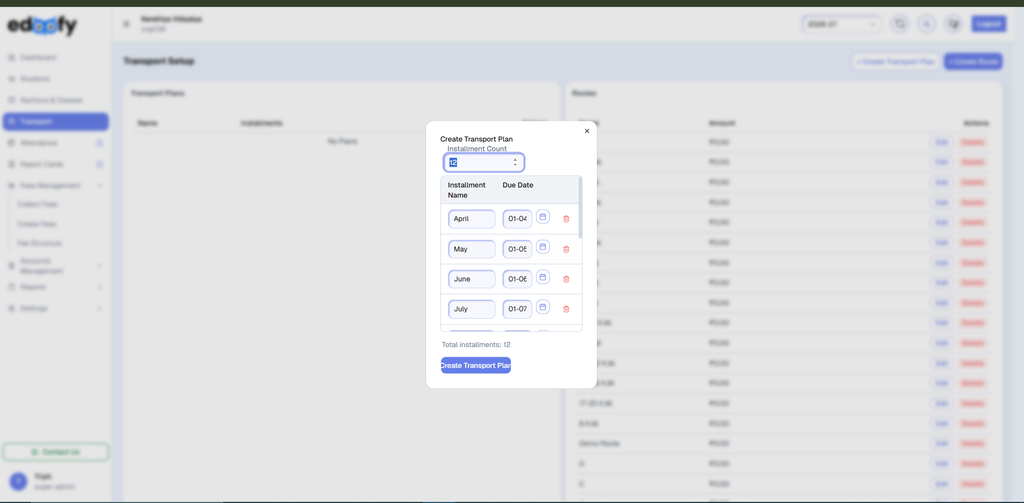
Create a Transport Plan #
Transport Plans define how the transport fee will be collected through installments.
- On the Transport Setup page, locate the Transport Plans section on the left side.
- Click + Create Transport Plan.
- A pop-up modal will appear.
- Select the required number of installments from the dropdown.
Example: 6 or 12
- Based on the selected number of installments, Edoofy will automatically generate the corresponding installment fields.
- Enter a name for the transport plan in the Installment Count field.
Example: Transport Plan (6 Months)
Configure Installments #
After selecting the installment count, configure the individual installments.
- Enter the Name for each installment.
Example:
- April
- May
- June
- July
- August
- September
- Review the Due Date generated for each installment.
- If required, modify the default due dates according to your school’s transport fee collection schedule.
- Review all installment details to ensure they are correct.
- Click Create Transport Plan.
The transport plan will be created successfully.
Verify the Transport Setup #
Once the transport plan and route have been created, they will be displayed on the Transport Setup page.
You can review:
- Created Transport Plans
- Available Routes
- Route amounts
- Installment schedules
- Due dates
Your transport fee setup is now ready.
Transport Setup Flow
Create Route → Enter Route Amount → Create Transport Plan → Select Installments → Configure Installment Names & Due Dates → Create Transport Plan
This completes the basic Transport Setup in Edoofy.


