
After completing institute onboarding, configure your Classes and Sections in the Edoofy School ERP system.
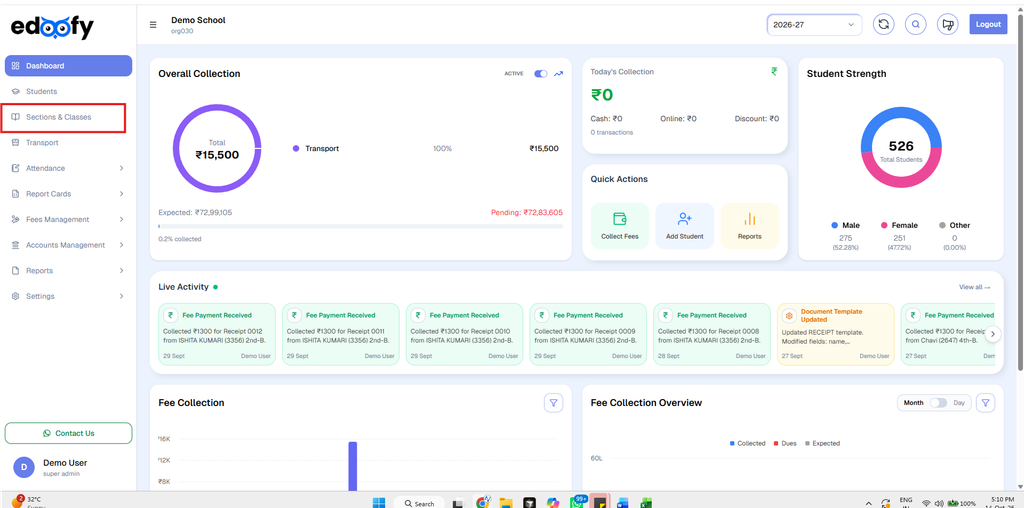
1. Create Classes #
To create the classes for your institute:
- Navigate to the Section & Classes from the left sidebar.
- Locate the Create Class search field.
- Enter all the class names you want to create, separated by commas.
Example:
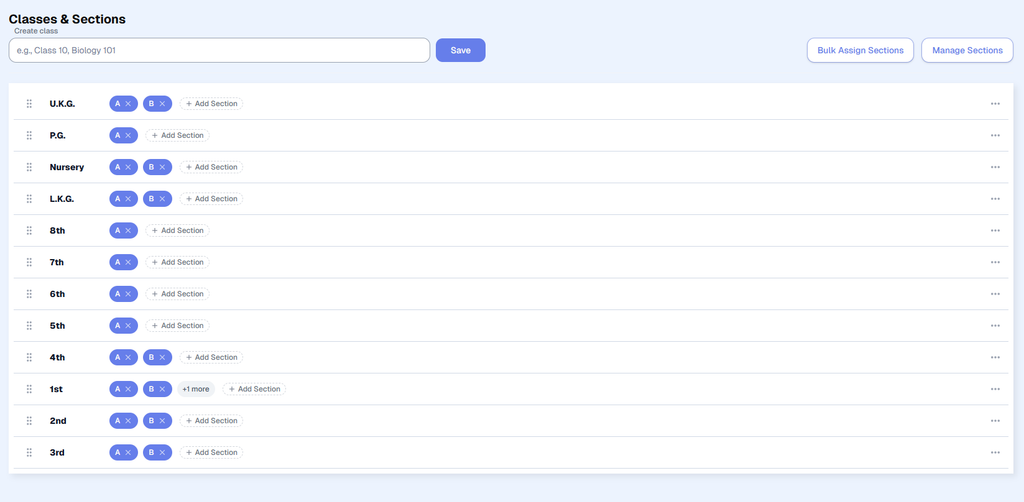
Nursery, LKG, UKG, Class 1, Class 2, Class 3
- After entering the required classes, click the Save button.
The classes will be created successfully and will appear in the class list.
2. Create Sections #
Along with the class creation option, you will find the Manage Sections option.
To create sections:
- Click on Manage Sections.
- Enter the names of the sections you want to create, separated by the Enter key.
- Click Save.
The sections will be added and will be available for assignment to your classes.
Example:
A, B, C, D
3. Modify Sections #
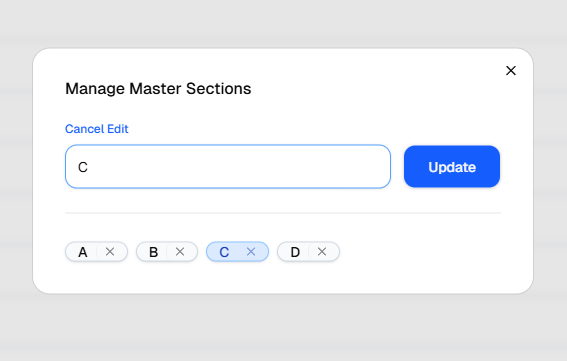
You can also edit an existing section whenever required.
- Go to Manage Sections.
- Click on the section you want to edit.
- Update the Section Name.
- Click the Save button.
- To delete a section, simply click the cross (x) next to the section name
4. Bulk Assign Sections to Classes #
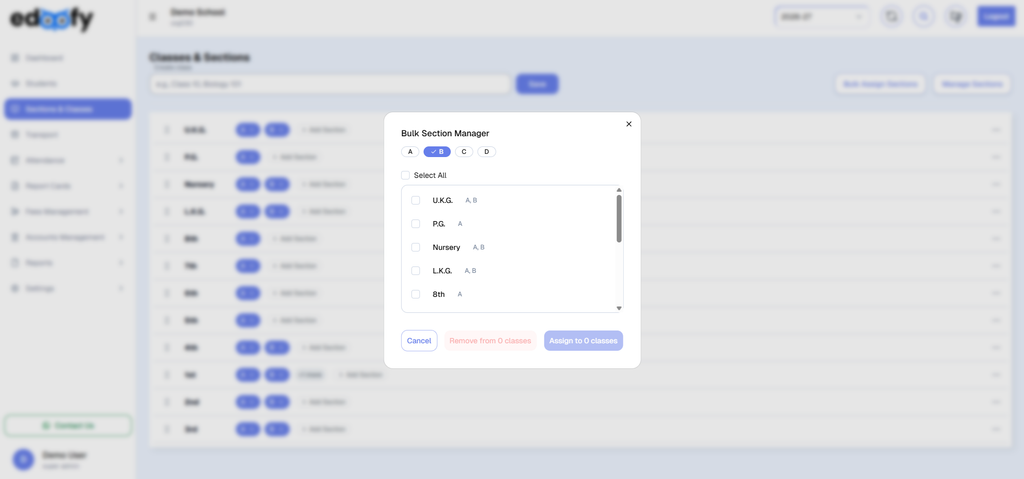
Edoofy also provides a Bulk Assign feature that allows you to assign sections to multiple classes at once.
To bulk assign sections:
- Click on the Bulk Assign Sections button.
- You will see the available classes along with their section badges.
- Select the classes to which you want to assign sections.
- Choose the required sections.
- Click on the Bulk Assign button.
The selected sections will be assigned to the respective classes.
This feature makes it easier to configure multiple classes without assigning sections individually.
5. Edit or Delete Class #
You can also manage individual sections directly from the class list.
- Locate the class or section you want to manage.
- Click the three horizontal dots in the right corner of the row.
- You will see the available actions.
- Select Edit to modify the Class details.
- Select Delete if you want to remove the class.
Note: Make sure to review the section details carefully before deleting any section.
Class & Section Setup Completed
Once your classes and sections have been created and assigned, your basic Class & Section configuration is complete.
You can now proceed to the next step of setting up your school’s academic and administrative information in Edoofy.


